Best Practices and Recommendations for Distributed SQL on Kubernetes
YugabyteDB and Kubernetes have very complementary design principles because they both rely on an extensible and flexible API layer, as well as a scale-out architecture for performance and availability. In this blog post we’ll look at best practices and recommendations when choosing Kubernetes as the cluster foundation for a distributed SQL system. This will begin with a review of relevant architectural decisions of the YugabyteDB. Then we’ll walk you through how to handle the provisioning, management, “Day 2” operations and auditing of a YugabyteDB deployment running on a Kubernetes cluster.
What’s YugabyteDB? It is an open source, high-performance distributed SQL database built on a scalable and fault-tolerant design inspired by Google Spanner. Yugabyte’s SQL API (YSQL) and drivers are PostgreSQL wire-protocol compatible.
Webinar Playback – Sept 11, 2019: Kubernetes Best Practices for Distributed SQL Databases
Guiding Architectural Principles
From a logical perspective, YugabyteDB is divided into API and storage layers. Similar to Kubernetes, YugabyteDB supports multiple query languages with a flexible and extensible API layer. YugabyteDB currently supports YSQL, which is compatible with PostgreSQL and is best suited for use cases that require referential integrity. It also supports YCQL for use cases where semi-relational queries dominate. The API layer is stateless so that queries can be balanced and handled by the storage layer. The storage layer is abstracted by a distributed document store. This DocDB store takes on the responsibilities of sharding and balancing data persistence, data replication, distributed transaction management and multiversion concurrency control (MVCC).
From a virtual process perspective, a YugabyteDB environment contains master nodes and worker nodes akin to Kubernetes. The masters maintain Raft (or cluster) consensus, metadata, and the replication of data. Tservers represent the worker nodes of a YugabyteDB cluster which implement both the front-facing API layer and the bulk of the backend document storage layer. The tserver scales out its storage layer into high-performance nodes as Kubernetes scales out with worker nodes. Tservers can optimize reads and writes across multiple disks targets, as well as across multiple nodes. Understanding the architectural principles of both platforms should help guide the practical deployment of YugabyteDB on your Kubernetes platform of choice.
Deploying Kubernetes
With Kubernetes, you normally use a “Kubernetes-as-a-service” offering from one of the major cloud vendors or you can “roll your own” a cloud agnostic tool such as Kubespray. The benefit of using a cloud-based service is that it should ensure you have a reliable foundation to build off of and an integrated AP for reliably creating your Kubernetes cluster so that it adheres to that vendor’s recommendations. With YugabyteDB, we’ve created a simple checklist for deploying on Kubernetes.
Helm
Helm has emerged as a methodical and easily shared method for consistent deployment and release management of applications on to Kubernetes clusters. YugabyteDB provides a helm repo that will allow for the standardized deployment of the database environment into your target cluster. With the directions available here, it’s easy to deploy a basic and highly available YugabyteDB. The default install assumes a replication factor (RF) of 3. You should plan on at least an equal amount of Kubernetes worker nodes to accommodate the RF sizing. With helm search yugabytedb/yugabyte -l you should see the versions available to install with 1.3.0 being the latest and most current as of this writing. Installing the latest version will typically give the best performance, most features and fixes available. Release information can be found via GitHub here.
Sizing
With any new technology, benchmarking and testing your own workload will guide the amount of CPU and memory you should allocate. When sizing the nodes expected to run the YugabyteDB instance, a minimal starting point that you should use are 8 vcpus and 30GB of memory. This can be customized for resource-constrained environments with a Helm option:
helm install yugabytedb/yugabyte --set resource.master.requests.cpu=0.1,resource.master.requests.memory=0.2Gi,resource.tserver.requests.cpu=0.1,resource.tserver.requests.memory=0.2Gi --namespace yb-demo --name yb-demo
These options can also be used to tailor your resource sizing while using the Helm chart for deployment. For previous examples of resource sizes and benchmarks, please refer to either these benchmarking and this scalability blogs.
Storage Design
In regards to persistent disks, the default disk type assigned to new GKE and EKS clusters are HDD-based persistent volumes. It’s important to note that YugabyteDB is optimized for SSD-based deployments. As a Kubernetes admin, you can add a new storage class to allow SSD assignment, for example on GKE.
After adding an appropriate storage class, you can override the options in the Helm chart, for example:
helm install yugabytedb/yugabyte --set storage.master.storageClass=faster,storage.tserver.storageClass=faster --namespace yb-demo --name yb-demo
You also have the option of changing the default disk type to SSD for all persistent disks. You can find a few examples here.
Network Design
Master and Tserver intra-cluster communication is necessary for cluster coherency and availability. This occurs via the name resolution of the local environment occur with minimal latency/network hops. Communication within a YugabyteDB cluster is handled via ClusterIP for internal communications. You can see this using get services within the relevant namespace. Helm configures a namespace with the --namespace option. Logical Masters and Tservers need to communicate for their coordination and data replication protocols. This requirement should be considered latency-sensitive for designing their network path.
(base) epsodi:yb-k8s andrewnelson$ kubectl get services -n yb-demo
NAME            TYPE           CLUSTER-IP      EXTERNAL-IP     PORT(S)                                        AGE
yb-master-ui    LoadBalancer   10.104.0.188    34.68.28.55     7000:32241/TCP                                 47h
yb-masters      ClusterIP      None            none        7100/TCP,7000/TCP                              47h
yb-tservers     ClusterIP      None            none          7100/TCP,9000/TCP,6379/TCP,9042/TCP,5433/TCP   47h
yedis-service   LoadBalancer   10.104.8.74     34.68.51.17     6379:31683/TCP                                 47h
yql-service     LoadBalancer   10.104.12.122   35.222.81.109   9042:31009/TCP                                 47h
ysql-service    LoadBalancer   10.104.12.80    34.66.68.112    5433:31442/TCP                                 47h
Name resolution is handled using the integrated Kubernetes DNS, such as CoreDNS or kube-dns for intra-cluster name discovery, for example:
yb-master-0.yb-master.$(NAMESPACE).svc.cluster.local:7100
For specific implementation details, see your corresponding distro provider such as GKE or EKS.
Multi-region deployment and 2 datacenter deployment (2DC) will be the topic of an upcoming blog. Integration with a service mesh such as Istio or Consul is in progress and can be tracked via our GitHub.
By default, client communication with the API layer external to the YugabyteDB cluster is not configured by default. In order to expose these interfaces via LoadBalancer and public IP, you’ll need to use the expose-all option with your Helm install command. For example:
helm install yugabytedb/yugabyte -f https://raw.githubusercontent.com/Yugabyte/charts/master/stable/yugabyte/expose-all.yaml --namespace yb-demo --name yb-demo --wait --set "disableYsql=false"
Pod Priority, Preemption, and PodDisruptionBudget
Assuming you have successfully created a Kubernetes cluster and installed YugabyteDB, there are still a few items worth mentioning about resources while in operation. Even if Yugabyte is the only app running on your Kubernetes cluster, it will also have management components, typically deployed in the kube-system namespace. This management overhead will be distro-dependent and which components you choose to deploy for management, networking, logging and auditing. If you choose to have additional apps deployed to the same Kubernetes cluster, it is recommended to be familiar with pod priority classes and how preemption may affect the running workloads. Because YugabyteDB is a stateful app, it is recommended that it have a higher priority for stability and availability purposes. For more information on Kubernetes preemption works, please check out this article.
In our example of a default deployment with RF3, the resiliency of a cluster depends on only 1 master node being down at a time or 1 worker node being down at a time. The Helm chart sets this up using the following configuration:
==> v1beta1/PodDisruptionBudget
NAME            MIN AVAILABLE  MAX UNAVAILABLE  ALLOWED DISRUPTIONS  AGE
yb-master-pdb   N/A            1                1                    2d3h
yb-tserver-pdb  N/A            1                1                    2d3h
For more information, check out the Kubernetes docs.
Dedicated nodes
In the case of multiple apps being deployed on a single Kubernetes cluster, the administrator also has the option to dedicate nodes to specific workloads with nodeSelector & labels. This keeps the performance and availability profile completely separate to a node granularity level. For more information, check out these Kubernetes docs.
Adding/Removing Nodes
Owing to master node and replication factor instantiation, you will start a cluster with the same number of masters as your replication factor, i.e. 3 master pods for an RF3 instance. The number of tservers can be scaled natively with the kubectl scale command, for example:
kubectl scale --replicas=5 statefulset/yb-tserver -n yb-demo
Performance Monitoring & Benchmarking
We always recommend testing a given environment in order to profile the performance of the given workload. If you don’t already have a database workload generator that is representative of your intended use-case, you can leverage one from Yugabyte here using:
java -jar target/yb-sample-apps.jar --workload SqlInserts --nodes $YCQL_IP --nouuid --value_size 256 --num_threads_read 32 --num_threads_write 4 --num_unique_keys 1000000000
This could be run either from your workstation or with a kubectl run… command with a container where you have java installed and can reach our GitHub repo.
kubectl run --image=yugabytedb/yb-sample-apps --restart=Never java-client --workload SqlInserts --nodes $YCQL_IP --num_threads_write 1 --num_threads_read 4 -- value_size 4096
Your YCQL_IP should be your load-balancer IP with the port number for YCQL from:
kubectl get services -n $NAMESPACE
For example: 10.10.1.234:5433
There are a couple out-of-the-box places to view the performance of the YugabyteDB instance. You can view this view the yb-master-ui external IP on port 7000.
(base) epsodi:yb-k8s andrewnelson$ kubectl get services -n yb-demo
NAME            TYPE           CLUSTER-IP      EXTERNAL-IP     PORT(S)                                        AGE
yb-master-ui    LoadBalancer   10.104.0.188    34.68.28.55     7000:32241/TCP                                 48h
yb-masters      ClusterIP      None            none          7100/TCP,7000/TCP                              48h
yb-tservers     ClusterIP      None            none          7100/TCP,9000/TCP,6379/TCP,9042/TCP,5433/TCP   48h
yedis-service   LoadBalancer   10.104.8.74     34.68.51.17     6379:31683/TCP                                 48h
yql-service     LoadBalancer   10.104.12.122   35.222.81.109   9042:31009/TCP                                 48h
ysql-service    LoadBalancer   10.104.12.80    34.66.68.112    5433:31442/TCP                                 48h
Performance counters could also be consumed via the metrics page from the YugabyteDB admin UI.

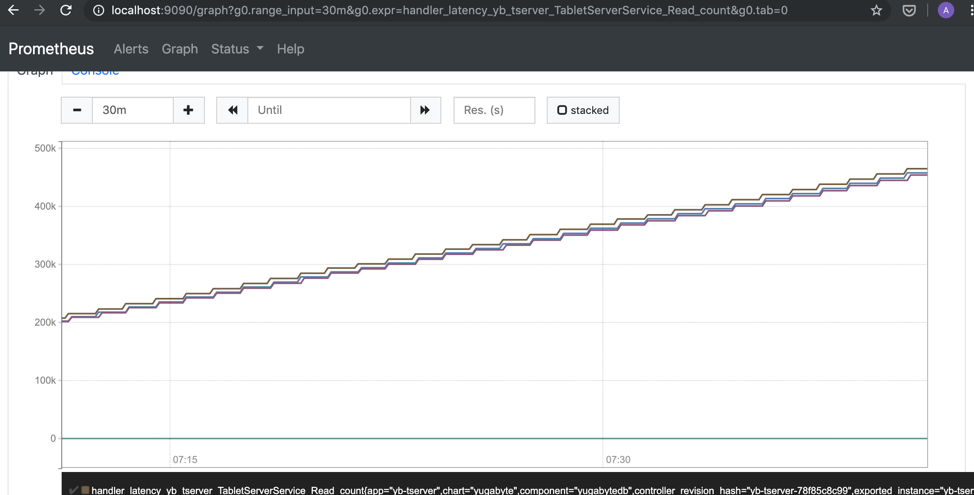
Another popular option is monitoring is to use Prometheus. Yugabyte presents a Prometheus endpoint via the yb-master-ui port and /prometheus-metrics URL. For example:
https://34.68.28.55:7000/prometheus-metrics
For more information, please refer to these Prometheus and observability articles.
Troubleshooting
Common deployment issues involving YugabyteDB on Kubernetes are often related to deviating from one of the design principles previously discussed. For example, a pod will typically remain in the ‘pending’ state if there is not enough resources. Basic Kubernetes troubleshooting commands will help point you in the right direction either by running a kubectl describe on the pods and nodes, as well as reviewing each of their applicable event logs with:
kubectl logs yb-master-0
You can also view the native YugabyteDB logs via an interactive login to a node. You can also achieve this via the yb-master-ui IP and logs html endpoint. For example:
https://34.68.28.55:7000/logs
Closing thoughts
Please raise any issues via our GitHub issue page and tag it with “Kubernetes”. This is extremely useful for our team and other users to track and resolve issues.
In regards to additional ongoing work in the Kubernetes ecosystem, please look for future blogs around Istio, including mTLS integration, our Rook.io storage operator, as well as our OpenShift-compatible operator.
What’s Next
- Compare YugabyteDB in depth to databases like CockroachDB, Google Cloud Spanner, and MongoDB.
- Get started with YugabyteDB on macOS, Linux, Docker, and Kubernetes.
- Contact us to learn more about licensing, pricing, or to schedule a technical overview.


