Building a Simple Application with YugabyteDB and Prisma
When building modern web applications, developers often find data modeling and data access to be productivity bottlenecks. Rather than moving towards a schema-less database solution, many find using an ORM (object-relational mapping) tool with SQL to be their preferred option. The Node.js community has long been supportive of the Sequelize ORM, with Prisma being a newer option for those looking to model, migrate, and query their data.
In this blog, we’ll get acquainted with Prisma and how it interfaces with Node.js and YugabyteDB. In doing so, we’ll use the Market Orders Application, which has instructions for connecting to YugabyteDB Managed or to a locally running cluster. This application subscribes to the PubNub Market Orders Stream and stores these trades in YugabyteDB using Prisma.
Running on YugabyteDB Managed
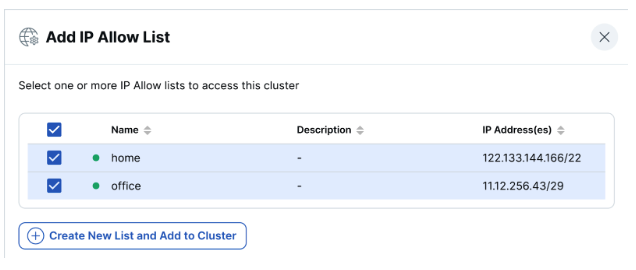
While local configuration instructions are available in the project repository, we’ll demonstrate how to connect to a perpetually-free YugabyteDB Managed instance. After creating an account and logging in, you’ll need to create a cluster that we can use to populate our trade data. Be sure to set up your IP Allow List, as shown below.
Now that we’ve created a cluster, we can connect to it via the ysqlsh CLI, a DB admin tool such as pgAdmin, DBeaver, or the YugabyteDB Managed Cloud Shell.
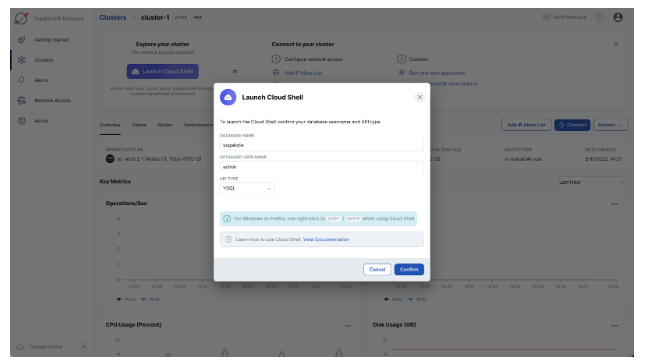
In the following section, we’ll populate the yugabyte database, which is available on your instance.
Connecting to YugabyteDB Managed via Prisma Client
Now we’re ready to use the Prisma CLI to initialize our database.
- Update the
DATABASE_URLin your.envfile. You’ll need to provide your host address, username and password. Also, be sure to supply thesslmode=requireparam to ensure a secure connection to your YugabyteDB Managed instance. Here is an example:
DATABASE_URL="postgresql://admin:qwerty12345@us-west-2.foo-bar-baz.aws.ybdb.io:5433/yugabyte?sslmode=require&statement_cache_size=0"
- We begin by executing the provided SQL script on your database.
npx prisma db execute --file prisma/db_schema.sql --schema prisma/schema.prisma
- Next, we pull the schema from our database to update the Prisma schema.
npx prisma db pull
- The previous command doesn’t pull our view, so we’ll need to add it to the
schema.prismafile manually.
model top_buyers_view {

 first_name String

 last_name String

 total_portfolio_value Int


 @@unique([first_name, last_name, total_portfolio_value])

}- We’re now ready to generate our Prisma Client.
npx prisma generate
- Finally, seed the database with some users.
npx prisma db seed
Using the YugabyteDB Managed Cloud Shell, we can now verify our database has been properly initialized.
Running the Market Orders Application
Assuming that you’ve made it this far, we’re ready to run our sample application.
First, we’ll need to initialize our web UI by running the following:
cd market-orders-client

npm install

npm run build
Next, we’ll return to our project root and run the application:
cd ..

npm start
In your browser, you should now see the application running at https://localhost:8000.
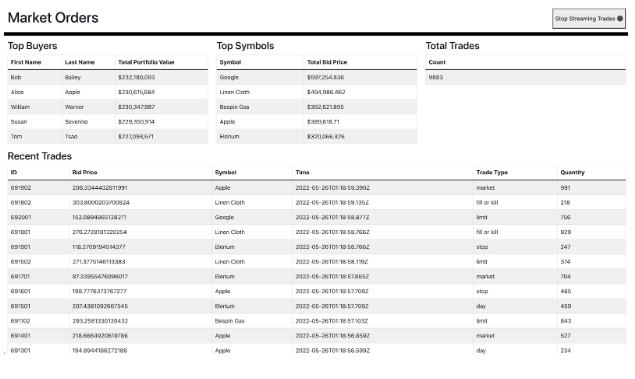
With the Prisma Client configured, we can easily create endpoints to query recent trades. Additionally, we can use the top_buyers_view to display the portfolio value of our wealthiest buyers. If I were Bob Bailey and had $232,180,093 in my portfolio, it’s unlikely that I’d be writing this blog post.
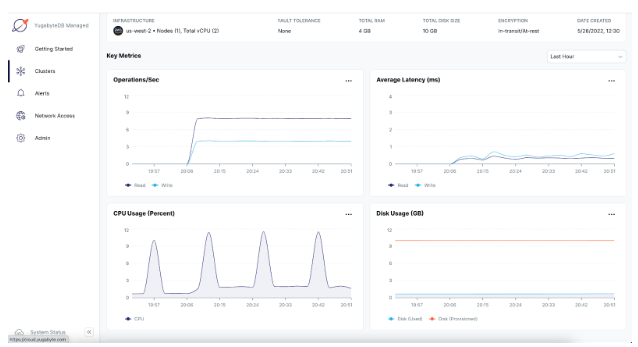
As you can see, we can now read from and write to our YugabyteDB Managed instance. It was extremely easy to build this application by using Prisma to interact with YugabyteDB, a highly PostgreSQL-compatible database. Now that you’re up and running, it’s time to go build something of your own.
Got questions? Join the YugabyteDB Community Slack channel to chat with over 5,500 developers, engineers, and architects.


