How to Run Debezium Server with Kafka as a Sink
Change data capture (CDC) captures changes made to data in a database and streams those changes to external processes, applications or other databases. In other words, the CDC process identifies whenever there are changes in a database or a table and records those changes to be processed by other downstream applications.
Debezium Server provides a ready-to-use application that streams change events from a source database to messaging infrastructure like Amazon Kinesis or Google Cloud. In this post, we’ll explore how to run Debezium Server with Kafka as a sink using the Debezium connector for YugabyteDB.
Steps to run Debezium Server with Debezium connector for YugabyteDB
More specifically, below are the steps you’ll need to follow to run Debezium Server with the Debezium connector for YugabyteDB.
1. Download Confluent’s community edition
Download the Confluent Platform by package. Make sure that once the package is downloaded, it’s also extracted.
2. Compile Debezium Server
Download the debezium-server package from here (add a GH link to the package) and extract it:

Additionally, extract the debezium-server package:

3. Create config files
Go to the debezium-server directory and create a `offsets.dat` file to store the offsets for debezium-server.

4. Start Zookeeper and kafka
We’ll assume the package is extracted in the root directory (if it is extracted somewhere else, change the path accordingly).
Next, navigate to the confluent directory. We have extracted it into our root directory, so the following step is relative to this one:

Start Zookeeper:

Start Kafka server in another terminal:

5. Start YugabyteDB using yugabyted
Next, download YugabyteDB’s package. Extract the package and start yugabyted.

6. Create a table and create a stream ID
From here, create a table using ysqlsh:

Next, create a stream ID using yb-admin:

More specifically, the above ID will produce an output like this:

7. Start Debezium server
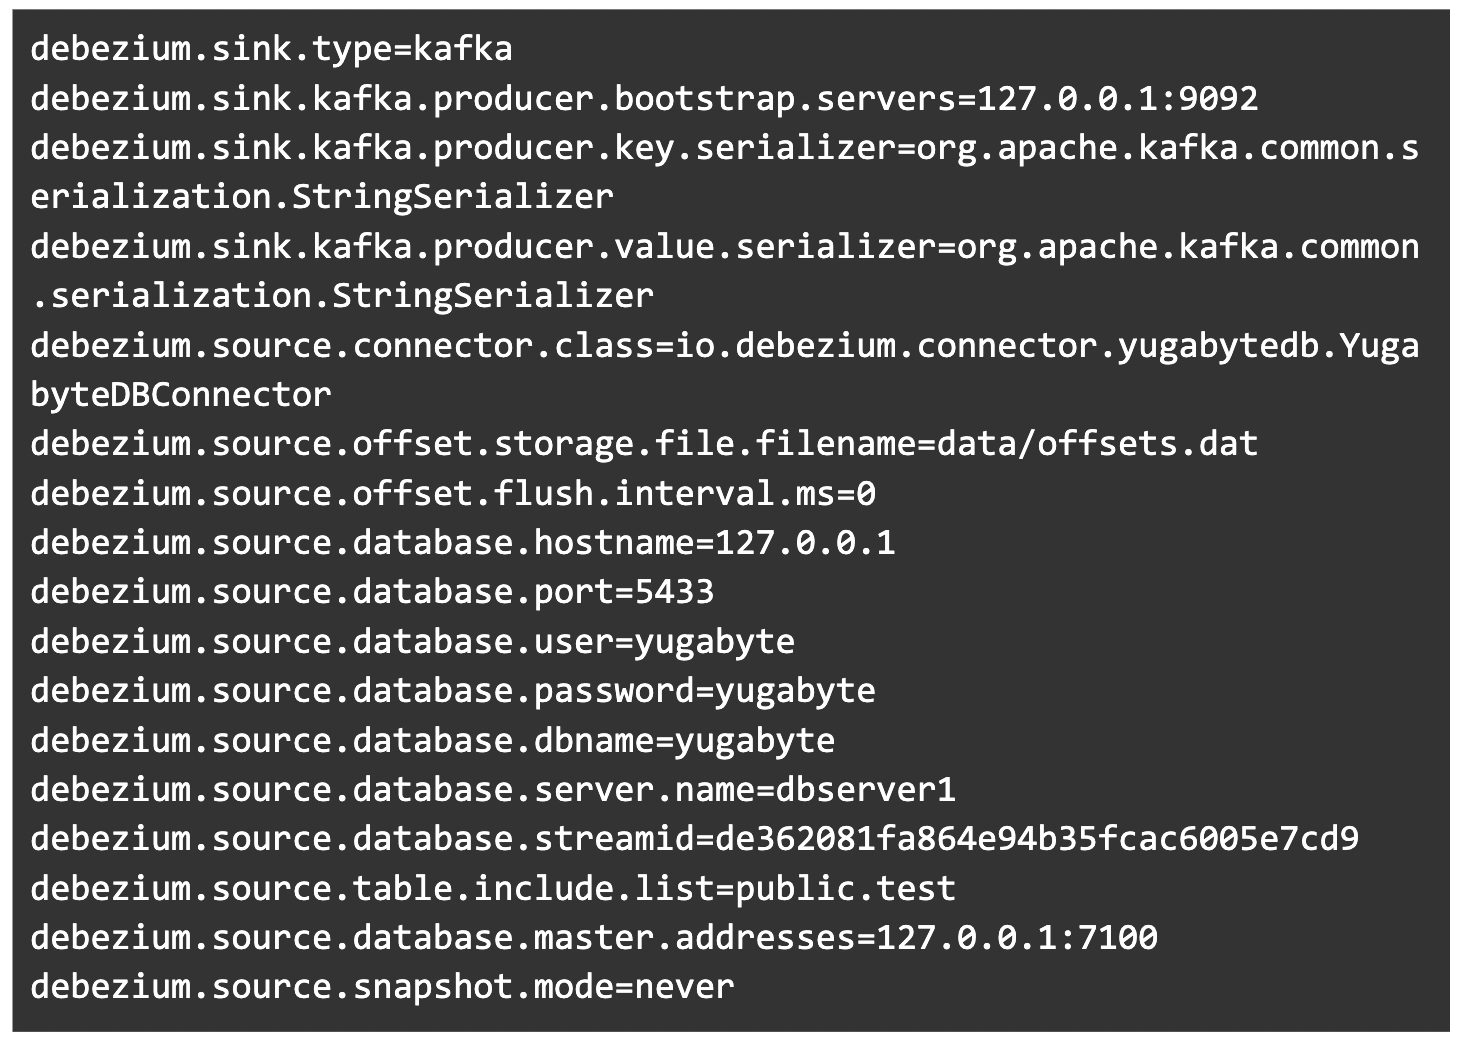
Before starting the debezium-server, we need to provide some configurations so that the connector can start pulling changes from YugabyteDB.
There is also a conf/ directory inside the debezium-server directory we just extracted in Step 3. Navigate to that directory.

Now create a `application.properties` file with the following content:

The stream ID here is the one you created in Step 6.
8. Start Kafka UI
We have been using the Kafka-UI by provectus labs. It’s minimal and at the same time provides all the relevant information. The source code also can be found here.
Note that the IP of the machine you are on will be needed to remove any ambiguity in the docker container if you pass 127.0.0.1.
It can also be directly started using:

We’ve mapped this UI to port 8079 on our local machine since the debezium-server also requires access to port 8080. Therefore, if the Kafka UI runs on that port, the debezium-server process won’t run.
Next, let’s go to the debezium-server directory (wherever you have extracted it). You’ll find a run.sh script in that directory, so that’s your entry point to debezium-server. Now let’s execute it:

9. Insert some data in the table created in Step 4
Insert a row:

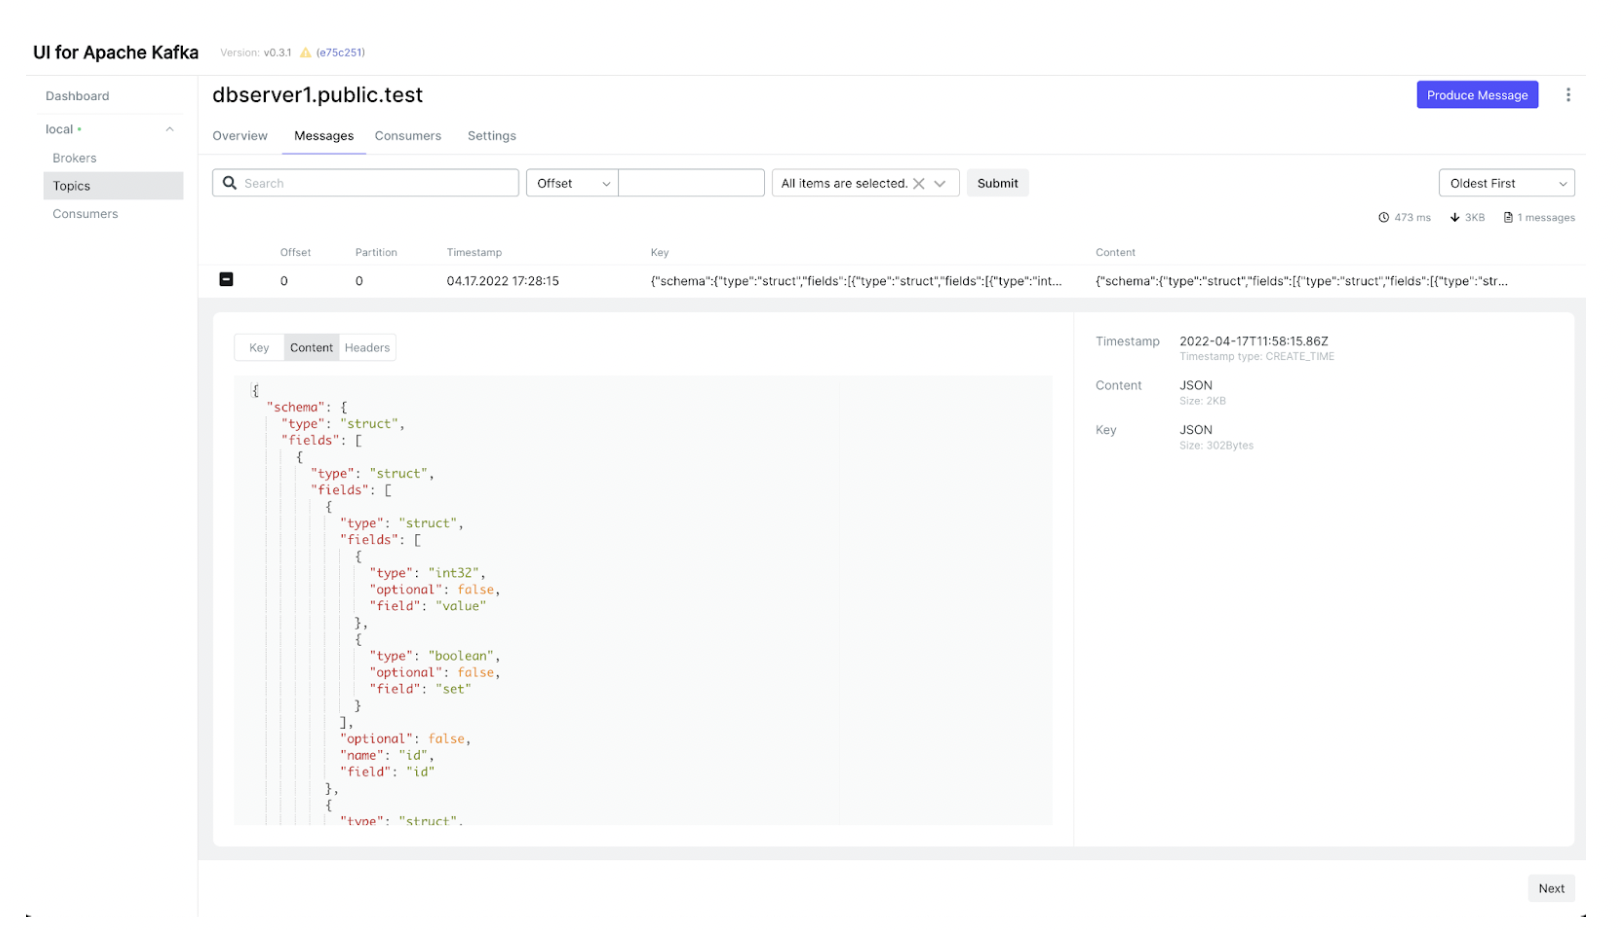
As soon as you insert data, you’ll see a message getting populated in the Kafka topic in the UI as shown in the below image:

And voila! The full setup of Debezium Server is now running. Please play around as much as you want.
Conclusion
In this blog, we successfully set up Debezium Server with Kafka as a sink using the Debezium connector for YugabyteDB. Finally, to read more about Change Data Capture (CDC) in YugabyteDB, head over to our Docs page.
Want to grow your YugabyteDB skills? Enroll in free online training courses and certification from Yugabyte University, the best resource for advancing your career.


