How to Integrate Yugabyte CDC Connector with Redpanda
In this blog, we’ll walk through how to integrate YugabyteDB CDC Connector with Redpanda.
Introducing YugabyteDB and Redpanda
Redpanda is a streaming data platform for developers built in C++ with a thread-per-core architecture to support high-throughput, real-time applications. It’s also fully Kafka API-compatible, JVM-free, ZooKeeper-free, and Jepsen-tested to be fast, safe, and simple to operate.
YugabyteDB is a distributed SQL database created for transactional (OLTP) apps. It is an open-source, cloud-native database is built to be robust and can operate on any cloud platform including public, private, or hybrid.
5 Differences Between Redpanda and Kafka
Redpanda is built to speak the Apache Kafka protocol. It supports the entire ecosystem of “sinks” (i.e. destinations) where you can write or stream data. The most common sinks supported by Redpanda are database sinks like BigQuery connector, GCS connector, Snowflake connector, and MongoDB Sink (export) connector. Additionally it supports AWS S3 Sink, and Apache Kafka sink (provided by MirrorMaker 2).
While it appears the same to the kafka-api user, Redpanda stands out more in terms of better performance, lower latency, and optimized resource utilization.
- Performance: Redpanda is built for high-performance and low-latency, with a focus on optimizing performance for modern hardware. By using a zero-copy design, it removes the need to copy data between kernel and user space. This in turn supports faster and more efficient data transfer.
- Scalability: Redpanda scales well both horizontally and vertically, making it easy to add or remove nodes from a cluster without downtime. Being essentially “a kafka”, it supports a fan-in and fan-out architecture, allowing multiple applications to utilize the same cluster without impacting performance.
- Storage: Redpanda stores commit-log segments in a similar way to Apache Kafka—in binary format both on local XFS mounts and on object storage utilizing the S3 protocol. Storing shadow copies of log segments on object storage provides users with enhanced fan-out using “remote read replicas.” It also allows for cluster recovery from those log segments in case of disaster scenarios.
- Security: Redpanda has built-in security features, including TLS encryption, SASL, mTLS, and Kerberos authentication. It utilizes ACLs in the same way as Kafka, allowing for easy migration and client integration. The same admin tools can be used for managing security settings.
- API compatibility: Redpanda goes beyond being a pub-sub system with a Kafka API wrapper. Its core commit log engine exclusively speaks the Kafka API, simplifying migration from Kafka to Redpanda without requiring changes to existing applications or protocols.
YugabyteDB CDC Using Redpanda Architecture
The diagram below shows the end-to-end integration architecture of YugabyteDB CDC using Redpanda.

The table below shows the data flow sequences with their operations and tasks performed.
| Data flow seq# | Operations/Tasks | Component Involved |
|---|---|---|
| 1 | Enable YugabyteDB CDC and Create the Stream ID for specific YSQL database (i.e. your database name) | YugabyteDB |
| 2 | Install and configure Redpanda using the Redpanda Quickstart Guide and download YugabyteDB Debezium Connector as referred in point#3 of this blog below. | Redpanda Cloud or Redpanda Docker and YugabyteDB CDC Connector |
| 3 | Create and deploy connector configuration in Redpanda. | Redpanda, Kafka Connect |
Set Up Redpanda With YugabyteDB CDC
Install YugabyteDB
You have several options to install or deploy YugabyteDB. NOTE: If you’re running Windows, you can leverage Docker on Windows with YugabyteDB.
Install and Setup Redpanda
Using Redpanda Quickstart Guide, spin up the Redpanda cluster using single broker configuration, multi-broker configuration using docker-compose, or a Redpanda cloud account.
Post installation and setup (using the Docker option), we can see that the Docker containers (below) are up and running. Figure 2 shows two Docker containers (redpanda-console and redpanda broker).


Figure 2: Redpanda Docker Containers Deploy YugabyteDB Debezium Connector (Docker Container):
Link the Redpanda Broker Address with YugabyteDB CDC Connector as highlighted in yellow below:
sudo docker run -it --rm --name connect --net=host -p 8089:8089 -e GROUP_ID=1 -e BOOTSTRAP_SERVERS=127.0.0.1:19092 -e CONNECT_REST_PORT=8082 -e CONNECT_GROUP_ID="1" -e CONFIG_STORAGE_TOPIC=my_connect_configs -e OFFSET_STORAGE_TOPIC=my_connect_offsets -e STATUS_STORAGE_TOPIC=my_connect_statuses -e CONNECT_KEY_CONVERTER="org.apache.kafka.connect.json.JsonConverter" -e CONNECT_VALUE_CONVERTER="org.apache.kafka.connect.json.JsonConverter" -e CONNECT_INTERNAL_KEY_CONVERTER="org.apache.kafka.connect.json.JsonConverter" -e CONNECT_INTERNAL_VALUE_CONVERTER="org.apache.kafka.connect.json.JsonConverter" -e CONNECT_REST_ADVERTISED_HOST_NAME="connect" quay.io/yugabyte/debezium-connector:latestFigure 3 show three Docker containers including YugabyteDB Debezium Connector and Redpanda connectors

Figure 3: Redpanda Docker Containers Deploy the Source Connector Using Redpanda
Create and deploy the source connector as shown below. Change the database hostname, database master addresses, database user, password, database name, logical server name and table to include list and StreamID as per your configuration (in yellow).
curl -i -X POST -H "Accept:application/json" -H "Content-Type:application/json"   localhost:8083/connectors/   -d '{
    "name": "srcdb",
    "config": {
      "connector.class": "io.debezium.connector.yugabytedb.YugabyteDBConnector",
      "database.hostname":"10.9.205.161",
      "database.port":"5433",
      "database.master.addresses": "10.9.205.161:7100",
      "database.user": "yugabyte",
      "database.password": "xxxx",
      "database.dbname" : "testcdc",
      "database.server.name": "dbeserver5",
      "table.include.list":"public.balaredpandatest",
      "database.streamid":"d36ef18084ed4ad3989dfbb193dd2546",
      "snapshot.mode":"initial",
      "transforms": "unwrap",
     "transforms.unwrap.type": "io.debezium.connector.yugabytedb.transforms.YBExtractNewRecordState",
     "transforms.unwrap.drop.tombstones": "false",
     "time.precision.mode": "connect",
     "key.converter":"io.confluent.connect.avro.AvroConverter",
     "key.converter.schema.registry.url":"https://localhost:18081",
     "key.converter.enhanced.avro.schema.support":"true",
     "value.converter":"io.confluent.connect.avro.AvroConverter",
     "value.converter.schema.registry.url":"https://localhost:18081",
     "value.converter.enhanced.avro.schema.support":"true"

    }
 }'
Monitor the Messages through Redpanda
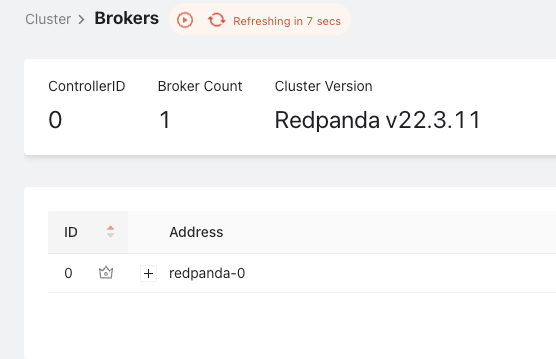
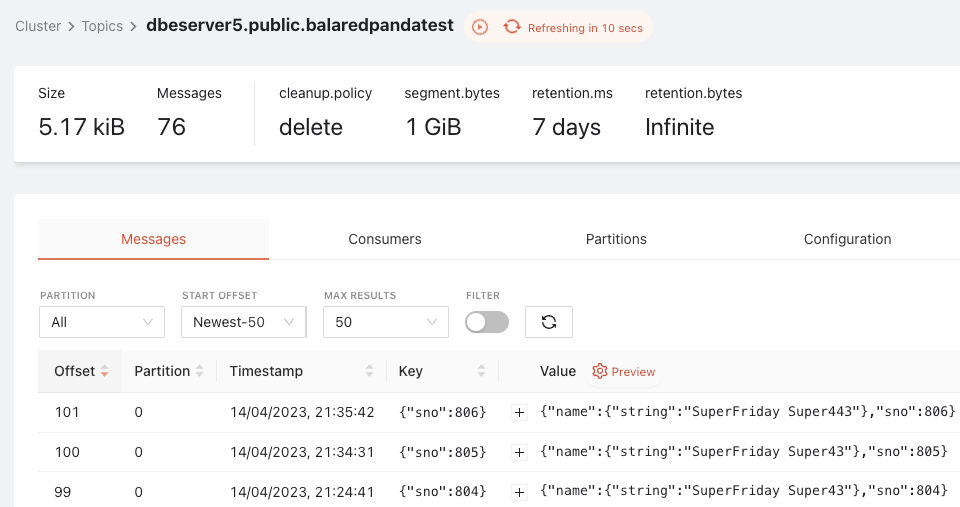
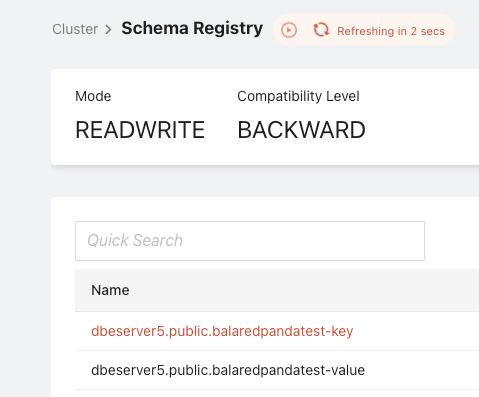
The images below show the Redpanda broker details that we installed locally using Docker, the topic that we subscribed (i.e.dbeserver5.public.balaredpandatest), and the schema registry—with key and value details—of the topic.


Conclusion and Summary
And that is it. In five easy step, we’ve walked through how to integrate YugabyteDB Change Data Capture with Redpanda to connect to a variety of different Redpanda-compatible sinks. By following these steps, you can seamlessly stream data from YugabyteDB, leveraging Redpanda’s Kafka API that provides high performance, low latency, and optimized resource utilization. By combining Redpanda and Yugabyte you can lower your total cost of ownership while providing next level scale and performance! We hope this blog has been informative and helpful in your data modernization and growth journey.


