How to Modernize Your JavaScript APIs Using Deno and YugabyteDB
Most developers are familiar with Node.js, which brought JavaScript to the backend via Google’s V8 runtime engine over 15 years ago. Node has been a great success, providing a non-blocking I/O that allows for high concurrency. Seeking to improve upon perceived design flaws in Node.js, its original creator, Ryan Dahl, released Deno in 2018, a competing runtime built on V8 and Rust.
Deno provides many compelling features, including native TypeScript support, built-in linting and testing, and default security measures. Newly-released Deno 2.0 boasts backward compatibility with Node.js, offering far greater performance.
In this blog, I’ll examine how to create a simple REST API using Deno and YugabyteDB.
Getting Started
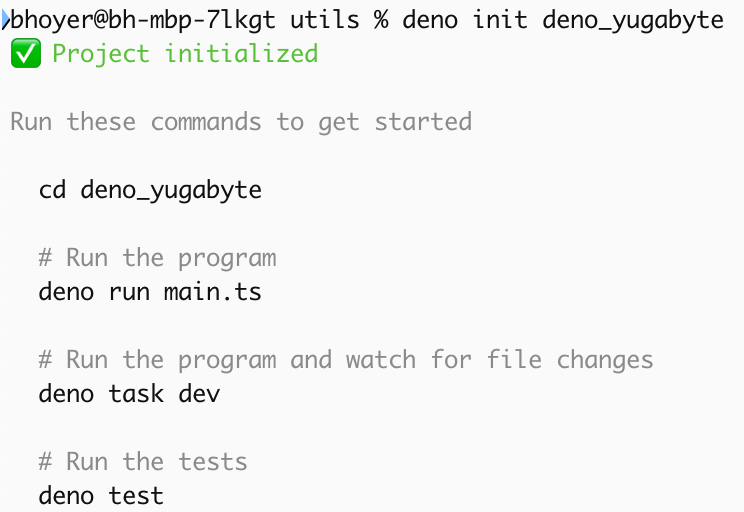
I’ve run the Deno installer on my machine and initialized a project named deno_yugabyte.

Deno’s default project structure provides a TypeScript entrypoint, main.ts. The default TypeScript compiler provides an environment for rapid development, without the need for time-consuming configuration. However, these abstractions are not opaque, so you can configure tools and dependencies via a deno.json file.
Running the dev task will automatically compile the code and watch for file changes. Let’s run this task and begin writing a simple REST server backed by YugabyteDB.
Building an API Server
Deno provides integration support for a variety of web frameworks.
In this example, I use Oak as an HTTP middleware framework and the YugabyteDB Smart Driver for Node.js for database interaction. That’s right, Deno 2.0 has added support for importing packages from NPM, allowing developers to include familiar tooling in their projects.
Here’s how I initialized a connection pool using the smart driver.
import { default as PG } from "npm:@yugabytedb/pg";
const { Pool } = PG;
if (import.meta.main) {
 const pool = new Pool({
   host: "localhost",
   user: "yugabyte",
   password: "yugabyte",
   database: "yugabyte",
   port: 5433,
 });
}
...
Next, I use this driver to connect to the database and execute some statements.
const dbExists = await pool.query(
   "SELECT EXISTS (SELECT FROM information_schema.tables WHERE table_schema = 'public' AND table_name = 'superheroes')"
 );

 if (dbExists?.rows?.[0]?.exists === false) {
   await pool.query(`CREATE TABLE IF NOT EXISTS superheroes(
     id SERIAL PRIMARY KEY,
     name varchar(255),
     powers text[]
   )`);
   // Inserting Superman
   await pool.query(
     `INSERT INTO superheroes (name, powers)
      VALUES ($1, $2)`,
     [
       "Superman",
       [
         "Super strength",
         "Flight",
         "Heat vision",
         "Super speed",
         "Invulnerability",
       ],
     ]
   );

   // Inserting Spider-Man
   await pool.query(
     `INSERT INTO superheroes (name, powers)
      VALUES ($1, $2)`,
     [
       "Spider-Man",
       [
         "Wall-crawling",
         "Super strength",
         "Spider-sense",
         "Super agility",
         "Web-shooting",
       ],
     ]
   );

   // Inserting Wonder Woman
   await pool.query(
     `INSERT INTO superheroes (name, powers)
      VALUES ($1, $2)`,
     [
       "Wonder Woman",
       [
         "Super strength",
         "Flight",
         "Invulnerability",
         "Combat mastery",
         "Healing",
       ],
     ]
   );
Since Deno’s runtime accepts both TypeScript and JavaScript, let’s add a Superhero interface. This will define the data model we expect when interacting with our database. I also imported the QueryResult type for use with the database driver.
interface Superhero {
 id: number;
 name: string;
 powers: string[];
}
import type { QueryResult } from "npm:@types/pg/index.d.ts";
Now, let’s use our database in conjunction with a set of REST APIs. Here’s how I imported Oak and created endpoints for CRUD operations.
const app = new Application();
const rootRouter = new Router();
const apiRouter = new Router({
   prefix: "/api/v1",
 });

 rootRouter.get("/", (context) => {
   context.response.body = "Welcome to the Superheroes API!";
 });

 apiRouter
   .get("/superheroes", async (context) => {
     // Get all superheroes.
     const result: QueryResult<Superhero> = await pool.query(
       "select * from superheroes;"
     );

     context.response.body = result.rows;
   })
   .get("/superheroes/:id", async (context) => {
     // Get one superhero by id.
     const { id } = context.params;
     const result: QueryResult<Superhero> = await pool.query<Superhero>(
       "select * from superheroes WHERE id = $1;",
       [id]
     );
     context.response.body = result.rows[0];
   })
   .post("/superheroes", async (context: Context) => {
     // Create a new superhero.
     const body = await context.request.body();

     if (body.type === "json") {
       const data: Superhero = await body.value;
       const { name, powers } = data;
       const result: QueryResult<Superhero> = await pool.query(
         "insert into superheroes(name, powers) VALUES ($1, $2) RETURNING *",
         [name, powers]
       );
       context.response.body = result.rows[0];
     } else {
       context.response.status = 400;
       context.response.body = { message: "Invalid request body type" };
     }
   })
   .delete("/superheroes/:id", async (context) => {
     // Delete a superhero by id.
     const { id } = context.params;
     const result: QueryResult<Superhero> = await pool.query(
       "DELETE from superheroes WHERE id = $1 RETURNING *",
       [id]
     );
     context.response.body = result.rows[0];
   });

 /**
  * Setup middleware.
  */

 app.use(rootRouter.routes());
 app.use(apiRouter.routes());

 app.use(rootRouter.allowedMethods());
 app.use(apiRouter.allowedMethods());

 /**
  * Start server.
  */

 await app.listen({ port: 8000 });
}
As mentioned, Deno includes security measures out-of-the-box, with flags for enabling potentially unsafe operations. This allows developers to enable only those actions required by the program.
For instance, I altered the default dev task in deno.json to include permissions for I/O, environment and network access, and module imports.
"tasks": {
   "dev": "deno run --allow-read --allow-write --allow-env --allow-net    --allow-import --watch main.ts"
 }
By running the Deno process with these flags, I can run the server and interact with a YugabyteDB database via the smart driver. For smaller projects that don’t require the advanced cluster topology and load balancing features of Yugabyte’s smart driver, Deno provides its own PostgreSQL driver, deno-postgres.
Conclusion
Deno 2.0 could prove a turning point in JavaScript’s evolution by introducing backward compatibility with Node.js and support for NPM packages (like Yugabyte’s Node.js Smart Driver) in Deno projects.
By adding these features to its impressive performance benchmarks, web-standard APIs, native TypeScript support, and other enhancements, Deno could well become the default choice for developers building JavaScript services.
Want to learn more about developing JavaScript applications backed by YugabyteDB? Check out one of our recent articles:
- Node.js Smart Drivers for YugabyteDB: Why You Should Care
- How to Build Low-Latency Global Applications with Google Apigee and YugabyteDB
Download YugabyteDB for free today to try it out.


