Node.js Smart Drivers for YugabyteDB: Why You Should Care
Distributed applications are all the rage in the modern development landscape. This trend has impacted the database world in a big way, with many companies including major retailers and financial services turning to distributed SQL to modernize their data layer.
PostgreSQL has skyrocketed in popularity in recent years, along with the distributed databases built on those PostgreSQL foundations. For example, YugabyteDB, originally inspired by Google Spanner, leverages the PostgreSQL query layer while scaling relational databases horizontally.
What exactly does this mean?
Traditionally, databases have scaled vertically, forcing companies to add more storage and memory to a monolithic data tier to increase scalability. This means scalability has hard limits based on hardware capacity and comes with a substantial price tag. Distributed databases scale horizontally, meaning more database nodes can be added to increase performance, survive outages and achieve data compliance.
In the following sections I’ll demonstrate how the YugabyteDB Node.js Smart Driver can be used to distribute load across database nodes with minimal additional configuration.
Connecting with Standard Node-Postgres Client
Node.js developers who work with PostgreSQL are likely to be familiar with the Node-Postgres database client. YugabyteDB is fully PostgreSQL-compatible, which means we can use Node-Postgres in much the same way as we’d use it to interface with a local or cloud-based instance of PostgreSQL.
Assuming we have a 3 node YugabyteDB cluster running in Docker with a populated Users table, here’s what creating a connection and executing a query looks like.
// Using a Single Connection
const { Client } = require("pg");

var connectionString = "postgresql://yugabyte:yugabyte@127.0.0.1:5433/yugabyte";
var client = new Client(connectionString);
await client.connect()
client.query("select * from Users");

// Using a Connection Pool
const { Pool } = require("pg");

/*
Connecting the application to one of three database nodes from within the Docker     network. Update the host accordingly to support your runtime environment.
*/
let pool = new Pool({
   user: "yugabyte",
   password: "yugabyte",
   host: "host.docker.internal",
   port: 5433,
   database: "yugabyte",
   max: 100,
});
const users = await pool.query("SELECT * FROM Users");
A connection pool is a good choice for high volume applications since each connection incurs a latency cost. By maintaining a pool, we eliminate the need to open a new connection on a per-request basis. In the example above, I’ve set a connection limit of 100 for our pool. You’ll want to tune this appropriately based on the number of services establishing database connections.
So, if Node-Postgres is compatible with YugabyteDB, why would you need another database client? Let’s get into it…
Balancing The Load
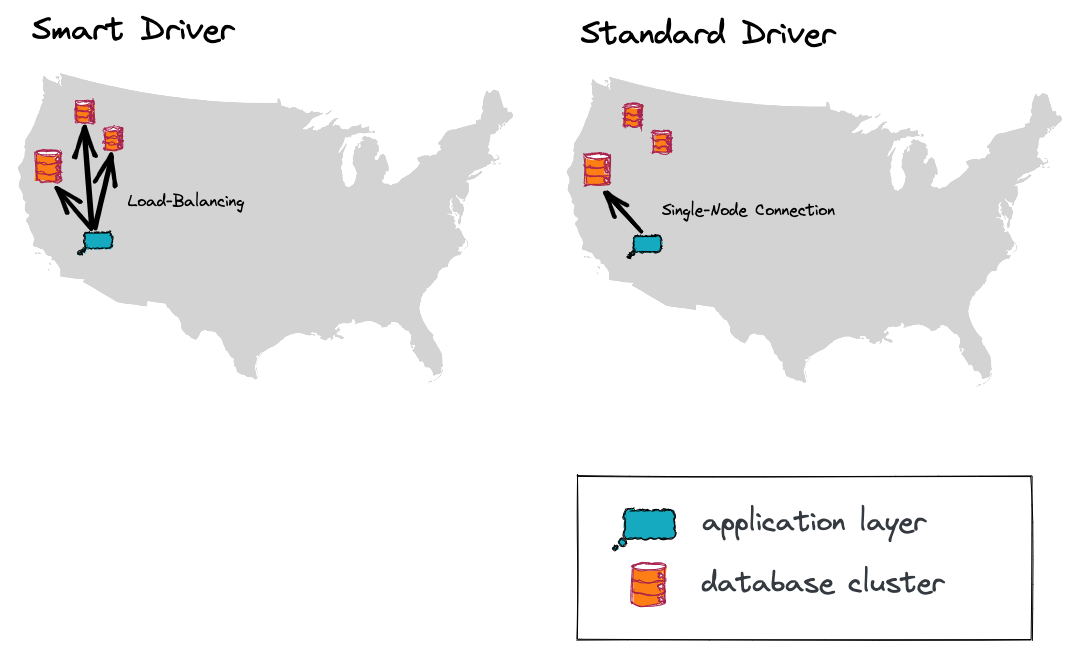
Whether establishing one-off or pooled connections, database clients like Node-Postgres are designed to establish connections to a single database node. This means in a multi-node distributed database, all of our requests will be made to a single node.
In a production environment, this has traditionally been solved by setting up one (or many)load balancers to route requests to multiple nodes in your database topology. However, there are downsides. What happens if we add nodes to our cluster? What about node failures? I’m sure you see where I’m going here. This is a maintenance nightmare.
The YugabyteDB Smart Driver handles this for us, without the need to route through load balancers. We can even balance requests between nodes in a particular zone or region, since the smart driver can be made aware of the cluster topology.
Let’s start by balancing requests evenly between our cluster nodes. YugabyteDB’s Node.js Smart Driver is built on Node-Postgres, making configuration nearly identical.
const { Pool } = require("@yugabytedb/pg");
let pool = new Pool({
   user: "yugabyte",
   password: "yugabyte",
   host: "host.docker.internal",
   port: 5433,
   database: "yugabyte",
   max: 100,
   loadBalance: true,
});

const users = await pool.query("SELECT * FROM Users");
Although we’re still connecting to the same host and port that we used previously, the smart driver is cluster-aware and will obtain addresses and open connections to each of the cluster nodes. By setting loadBalance: true, we’re telling our driver to obtain the addresses of all cluster nodes and automatically balance the load between the available nodes.

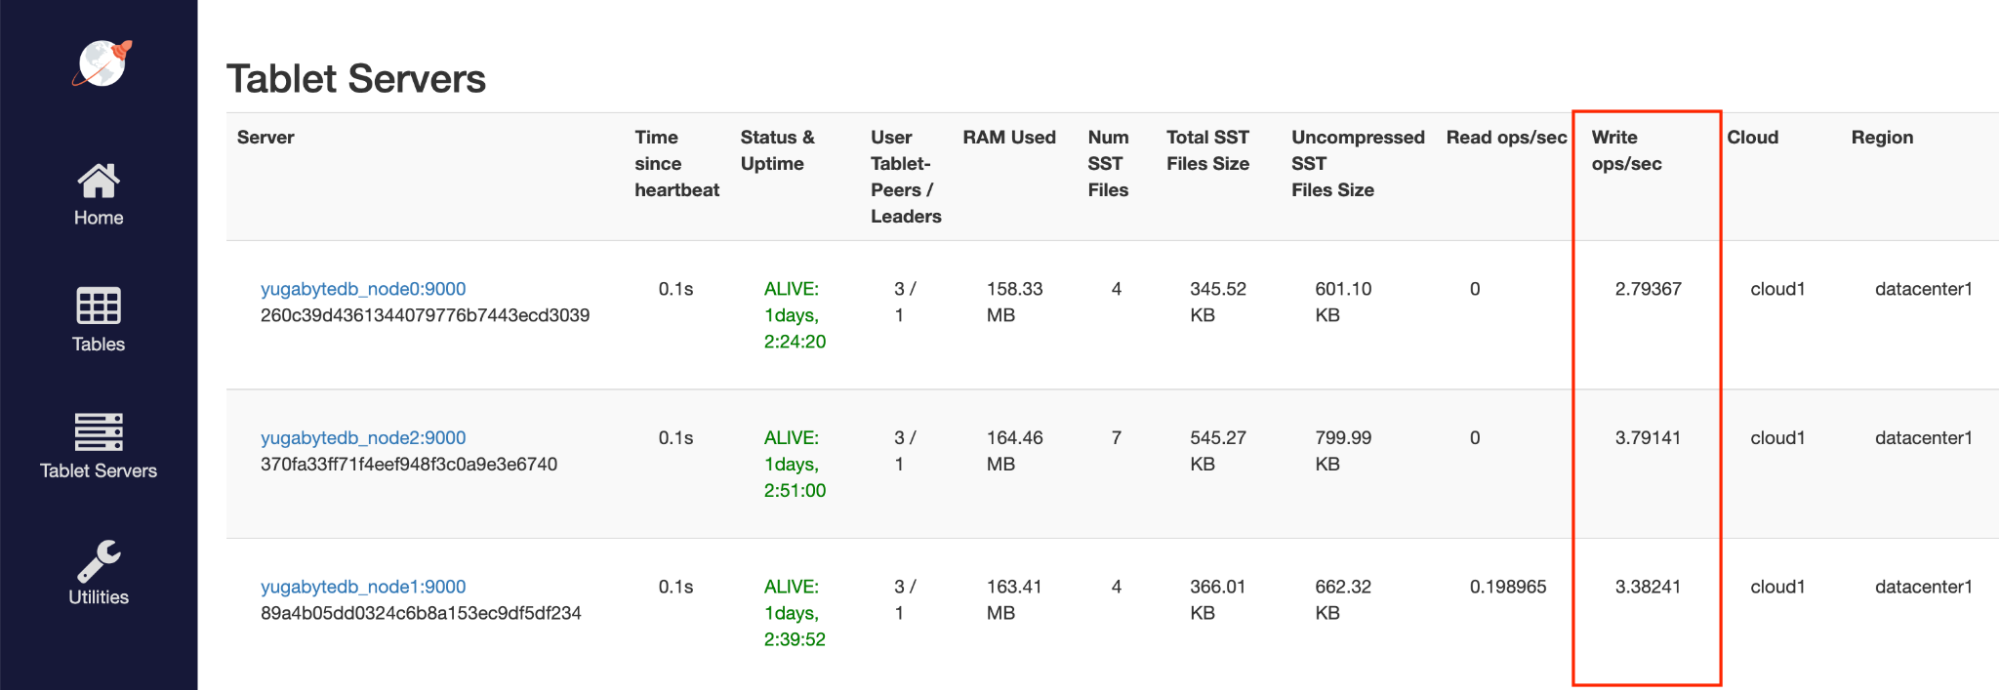
As our application receives traffic, queries are executed as evenly as possible across our infrastructure. By executing a number of writes to our database each second, we can see that each of our nodes are receiving traffic.
Most importantly, each of our nodes has a number of pooled connections. Using a standard driver, a connection is made to a single node and this node is responsible for distributing requests across the cluster. With the YugabyteDB Smart Driver, each node in our cluster is serving traffic in our connection pool.

Now, we’re talking! So, what happens when nodes are added and removed?
Well, nodes added to the cluster will begin receiving traffic once tablets have been allocated to the new node and the cluster has been balanced.
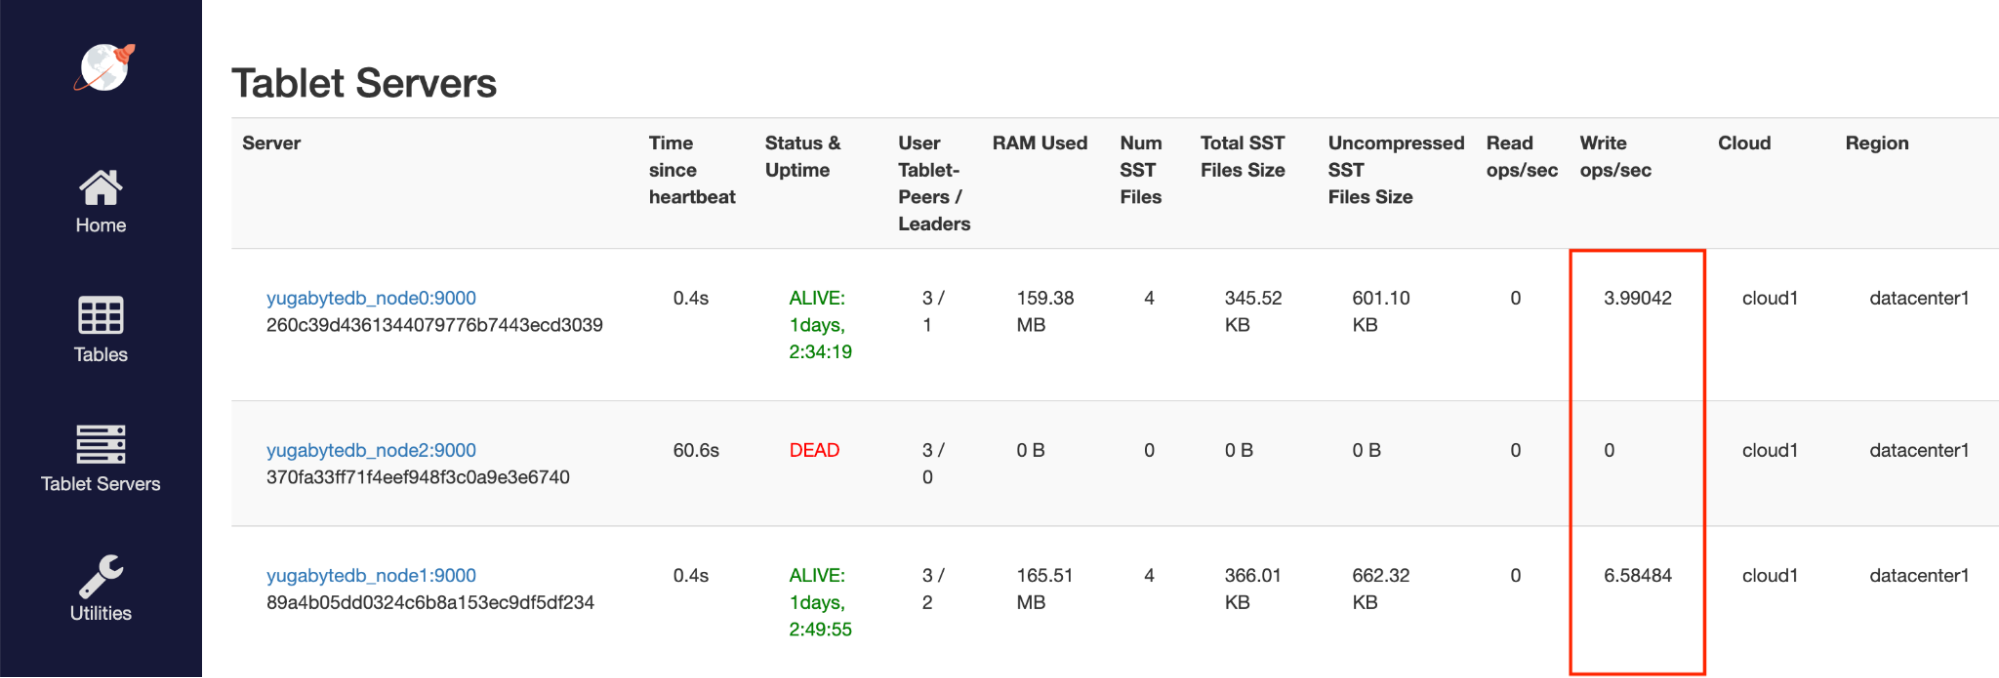
If a cluster node goes down, the cluster begins rebalancing almost immediately, typically within a couple of seconds. By default, if 60 seconds have passed since the last heartbeat, a database node is pronounced dead.

By utilizing the smart driver, there is no application downtime. Our client seamlessly routes traffic to the available cluster nodes in the event of scaling or outage. This is a huge win for developers, as the headaches associated with balancing requests, monitoring node health, etc. are all managed by the smart driver itself, rather than application code or external services!
What if our database deployment spans multiple regions?
In this case, evenly distributing requests across all database nodes doesn’t make much sense. Ideally, we’d like to limit requests to nodes within a reasonable distance.
As you might have guessed, we have that covered!
(Topology) Keys For Success
Adding a topology_keys parameter to our connection allows us to target nodes with higher granularity, while maintaining all of the same properties of a load-balanced database client. This topology-aware load-balancing requires very little configuration.
...
const { Pool } = require("@yugabytedb/pg");
let pool = new Pool({
  user: "yugabyte",
  password: "yugabyte",
  host: "host.docker.internal",
  port: 5433,
  database: "yugabyte",
  max: 100,
  loadBalance: true,
  topology_keys: "aws.us-west-1.us-west-1a,aws.us-west-1.us-west-1b"
});
...
By supplying a comma-separated list of topology keys, we’re telling the database client to route requests only within the provided locations. In the example above, I’ve chosen to only send requests to aws.us-west-1.us-west-1a and aws.us-west-1.us-west-1b since this is where my application instance is deployed.
Running Node.js microservices is fairly easy to orchestrate by passing topology information as an environment variable, or loading it via a configuration file. You can read about how I’ve achieved this in the past in this article.
Conclusion
As developers, it’s rare that we’re able to build complex systems without writing additional code to aid its orchestration. Smart drivers allow us to do just that. By eliminating the need to spin up load balancers and keep them up to date, we can write more core application code, rather than a series of checks and balances that prevent system failures. This is a massive benefit from a latency and developer productivity standpoint.
Give YugabyteDB and its Node.js Smart Driver a try for yourself!


